Replacing a faulty wine cooler door seal, also known as a gasket, is a straightforward process that can significantly improve your unit’s efficiency and cooling performance. A worn or damaged seal allows warm air to enter, forcing the compressor to work harder and consume more energy. You can typically replace a door seal in under 30 minutes with basic tools.
Identifying a Faulty Wine Cooler Door Seal
Before you begin, it’s crucial to confirm that the door seal is indeed the problem. A simple test involves closing the door on a dollar bill or a piece of paper. If you can easily pull the paper out, the seal is likely compromised. Repeat this test at several points around the door. Another indicator is visible cracks, tears, or hardening of the rubber gasket. You might also notice condensation inside the cooler or excessive frost buildup, which are signs of air leakage.
Gathering the Right Replacement Seal and Tools
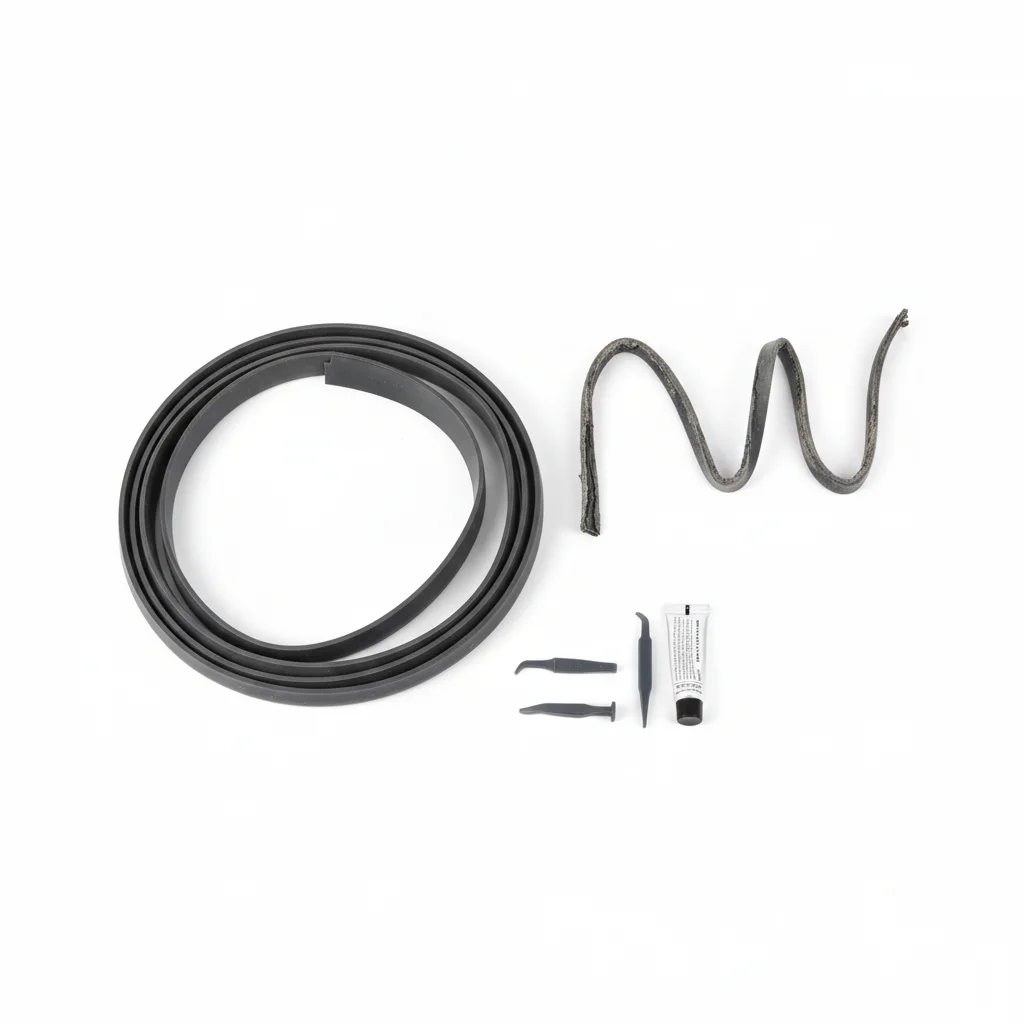
The most critical step is obtaining the correct replacement door seal for your specific wine cooler model. Check your owner’s manual or the manufacturer’s website for part numbers. Many seals are model-specific, so avoid generic replacements if possible. You’ll typically need a flathead screwdriver, a Phillips head screwdriver, and possibly a utility knife or a putty knife. A clean cloth and some mild soap and water will also be useful for cleaning the door frame before installation.
Step-by-Step Guide to Replacing the Door Seal
|
Our Picks for the Best Wine Cooler in 2026
As an Amazon Associate I earn from qualifying purchases.
|
||
| Num | Product | Action |
|---|---|---|
| 1 | Ivation Premium 6 Bottle Horizontal Thermoelectric Wine Cooler/Chiller Counter Top Red & White Wine Cellar w/Digital Temperature, Freestanding Refrigerator Quiet Operation Fridge |

|
| 2 | Wine Enthusiast 32-Bottle Dual Zone MAX Compressor Wine Cooler – Freestanding Mini Fridge with Digital Touchscreen, LED Display, Split Storage for Red & White Wines, Matte Black Refrigerator Home Bar |
|
| 3 | Wine Enthusiast 6-Bottle Countertop Wine Cooler – Compact Mini Fridge for Kitchen or Bedroom with 3 Shelves, Energy-Efficient Cooling, Adjustable Digital Temperature Control |
|
| 4 | BLACK+DECKER Wine Fridge 12 Bottles, Thermoelectric Wine Cooler Refrigerator with Mirrored Front, Freestanding 12 Bottle Wine Fridge, BD60336 |
|
| 5 | Ivation 12 Bottle Red And White Wine Thermoelectric Wine Cooler/Chiller Counter Top Wine Cellar with Digital Temperature Display, Freestanding Refrigerator Smoked Glass Door Quiet Operation Fridge |
|
| 6 | Cuisinart CWC-800CEN 8-Bottle Private Reserve Wine Cellar |
|
| 7 | BLACK+DECKER Wine Cooler 8 Bottle,Wine Fridge Thermoelectric with Mirrored Front,Freestanding Wine Cooler Refrigerator &LED Display,BD60326 |
|
| 8 | Ivation Premium Stainless Steel 8 Bottle Horizontal Thermoelectric Wine Cooler/Chiller Counter Top Red & White Wine Cellar w/Digital Temperature, Freestanding Refrigerator Quiet Operation Fridge |
|
| 9 | Ivation 12 Bottle Compressor Wine Cooler Refrigerator w/Lock, Large Freestanding Wine Cellar Fridge, 41f-64f Digital Temperature Control Glass Door Black |
|
| 10 | BLACK+DECKER BD60026 Wine Cellar with LED Display (8-Bottle Capacity) |
|
First, unplug your wine cooler from the power outlet to ensure safety. Open the door fully. Most door seals are either press-fit into a channel or secured with screws. If it’s a press-fit, carefully pry the old gasket out of the channel using a flathead screwdriver, working your way around the perimeter. If it’s screwed in, remove all the screws holding the gasket in place. Once the old seal is removed, clean the door frame thoroughly to remove any dirt, grime, or adhesive residue. This ensures a good seal with the new gasket.
- Unplug the wine cooler for safety.
- Carefully remove the old gasket, noting its attachment method.
- Clean the door frame thoroughly with mild soap and water.
- Align the new gasket, starting from a corner.
- Press or screw the new gasket firmly into place.
Installing the New Wine Cooler Door Seal
Begin by aligning the new gasket in one of the corners of the door frame. If it’s a press-fit seal, gently push it into the channel, working your way around the entire perimeter. Ensure it’s seated snugly and evenly. For screw-in seals, align the holes in the new gasket with the screw holes in the door and reinsert the screws, tightening them just enough to secure the seal without deforming it. Once the new seal is fully installed, close the door and let it sit for a few hours before plugging the unit back in. This allows the new gasket to settle and form a proper seal.
Testing and Maintenance After Replacement
After plugging the wine cooler back in, perform the dollar bill test again to confirm the new seal is working effectively. You should feel significant resistance when trying to pull the paper out. Monitor the internal temperature of your wine cooler for the next 24-48 hours to ensure it’s maintaining the desired temperature consistently. Regularly clean your door seal with a damp cloth to prevent dirt and debris buildup, which can compromise its integrity over time. Proper maintenance can extend the life of your new gasket and maintain optimal cooling performance.
Get our weekly buyer guide
Practical specs, not advice. Unsubscribe anytime.
This guide was really helpful. I had noticed some condensation inside my cooler and couldn’t figure out why. Turns out, my old seal was cracked and hard. The replacement process was pretty straightforward, just like it said, and I got it done in about 25 minutes. My only minor complaint is that getting the old gasket off was a bit tougher than expected, but overall, a great result.
I tried replacing my door seal after noticing some excessive frost buildup, which was a clear indicator. The instructions were mostly clear, but I had a bit of trouble finding the exact replacement part for my specific cooler model. It took some extra searching online. Once I got the right one, the installation itself was quick, but that initial part hunt was a bit of a hassle.
I was so frustrated with my wine cooler constantly running and not keeping a consistent temperature. The dollar bill test mentioned here was a game-changer for confirming my suspicions about the door seal. I ordered a new gasket and followed the steps, and now my wines are perfectly chilled and the compressor isn’t working overtime. Such a simple fix that made a huge difference!
My wine cooler was struggling to maintain its temperature, and I was worried I’d have to buy a whole new unit. Thankfully, I found this information about replacing the door seal. The visible cracks on my old rubber gasket were a clear sign. It was surprisingly easy to do, and now my wines are back to their ideal serving temperature. Highly recommend checking your seal if you’re having cooling issues.